How to Change a Tire in a Correct, Safe, and Frustration-Free Way
A sudden flat shreds your schedule in seconds. how to change a tire Maybe you heard the flapping sound on the highway, or you walked out of a grocery store to see the rear corner sagging. Your first reaction is often a mix of annoyance and mild panic. But here’s the truth: swapping a tire is a physical skill anyone can learn. This guide strips away the confusion and walks you through every single action, from spotting a safe spot to tightening the last lug nut. You don’t need mechanical talent. You just need a clear order of operations and a few safety rules burned into your memory.
What You Absolutely Must Know Before You Start
Roadside deaths happen because people skip this section. The moment you sense a tire failure, grip the steering wheel firmly, take your foot off the gas, and let the vehicle slow down naturally. Do not slam the brakes. Scan for a flat, straight stretch of pavement well away from moving traffic. A parking lot or a quiet residential street is ideal. Soft earth or grass will sink your jack and create a very dangerous situation. Turn on your hazard lights the second you slow down. Apply the parking brake fully, even if the ground looks level. Place wheel chocks, a brick, or a large rock behind the opposite wheel to block rolling. If you have a reflective triangle or flares, set them up 50 feet behind your car to force approaching drivers to change lanes. These first 90 seconds decide whether you fix a tire or become a roadside casualty.
Tools You Need to Change a Tire Correctly
Manufacturers hide the tool kit in strange places. Pop the trunk and lift the floor cover. In SUVs and minivans, look under the rear cargo area. Some trucks store the equipment behind the seatback. The bare minimum kit you must have:
- A spare tire with proper air pressure (check it every three months)
- A jack designed for your car’s weight rating
- A lug wrench or tire iron
- Your vehicle’s owner manual for exact jack point locations
Factory-issued scissor jacks and short lug wrenches do the job but require a lot of physical effort. Add a few items to your trunk that make the process faster: a 24-inch breaker bar with a matching socket, a 12-volt air compressor, thick work gloves, an LED headlamp, and a kneeling pad. A torque wrench also prevents over-tightening, which warps brake rotors. Spending $60 on these upgrades pays back in split knuckles you’ll never have.
Where to Position the Jack for a Safe Lift
Placing the jack under the wrong component crushes fuel lines, punches a hole through the floor pan, or collapses the pinch weld. Every unibody car has four designated reinforced notches behind the front wheels and ahead of the rear wheels. Look underneath the rocker panel for a vertical metal seam or a small arrow stamped into the body. SUVs with body-on-frame construction often allow jacking directly under the frame rail or the lower control arm mount. If you hear crunching while lifting, stop immediately and reposition. Never lift a vehicle on a slope. If no flat surface exists, call roadside assistance. A rolling car kills.
Loosen the Lug Nuts Before the Tire Leaves the Ground
This step trips up beginners every time. A wheel spins freely once the tire is in the air, making it impossible to break stubborn nuts. Fit the lug wrench over the first nut with the handle angled so you push downward using your body weight. Stand on the wrench if necessary. Crack each nut loose exactly one-half turn. Do not remove them yet—you just want the initial bond broken. Work in a star pattern to evenly release tension. If rust has seized a nut, apply penetrating fluid and wait three minutes. A hollow pipe slipped over the lug wrench handle multiplies your leverage. Patience here saves energy.
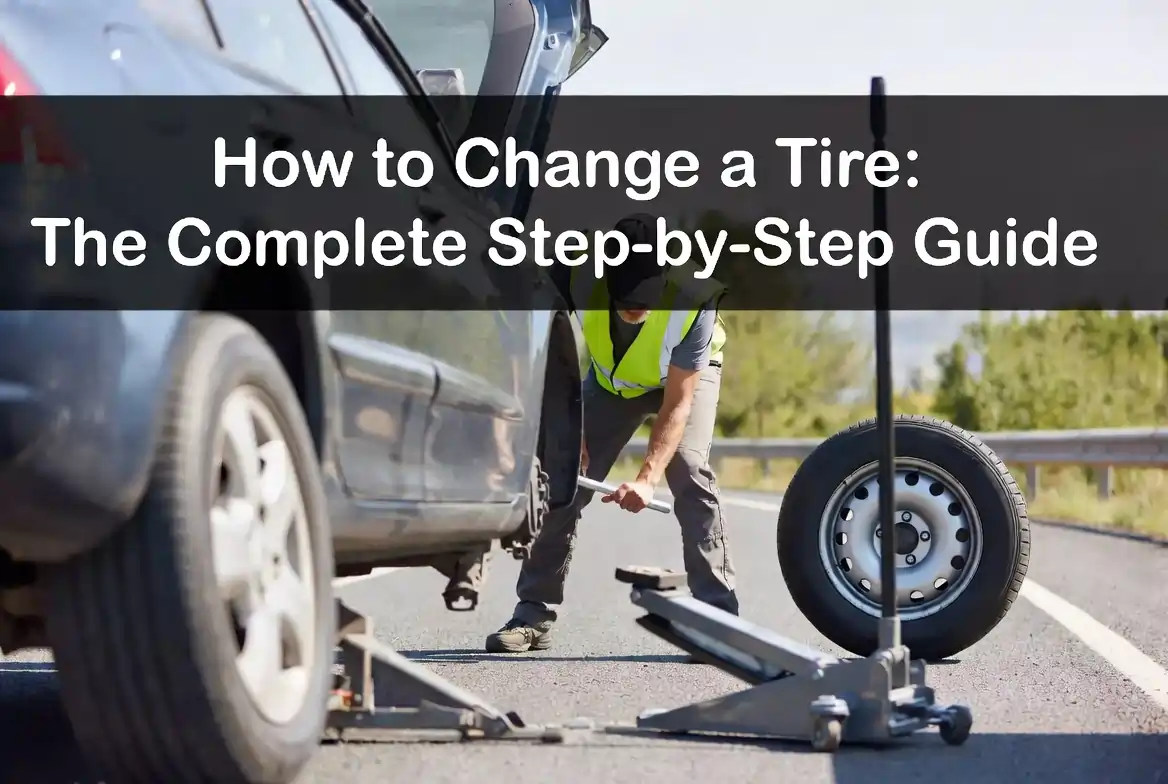
How to Change a Tire by Safely Lifting the Vehicle
With the nuts broken free, slide the jack under the verified lift point and raise the saddle until it meets the metal. Keep your hands and head away from the wheel well during the entire lift. Crank the handle steadily. Stop the instant the flat tire clears the ground by two inches. You do not need height—you need stability. Give the car a gentle shove at the roof line before you remove a single nut. If the vehicle wiggles, lower it and fix the jack’s footing. A slight movement means the setup is not solid.
Removing the Flat and Mounting the Spare
Spin the loosened nuts off by hand and place them in your pocket or a hub cap turned upside down. Dropping a lug nut into tall grass guarantees a frustrating search. Pull the flat tire straight toward your body and roll it to the side. Lift the spare onto the hub, aligning the holes with the wheel studs. Push it flush. This is the moment people accidentally cross-thread the nuts. Spin each one by hand in a star sequence until they seat fully against the wheel. Hand-tighten until you cannot spin them anymore with just your fingers.
Lowering and Tightening Everything in the Right Order
Crank the jack in reverse and let the spare touch the pavement. Remove the jack. Now grab your lug wrench and tighten the nuts using the star pattern again. Apply your full weight in a controlled, steady pull. Jumping on the wrench can strip the studs. The goal is snug, not superhuman. If you have a torque wrench, set it to your car’s specification—usually between 80 and 100 foot-pounds—and click each nut. Drive five miles, pull over in a safe place, and re-check the tightness. Lugnuts often settle after initial driving.
Critical Spare Tire Restrictions You Must Obey
A compact spare, often called a donut, is a temporary solution stamped with a maximum speed of 50 mph. Exceeding this speed overheats the thin rubber and causes a blowout that is far more violent than your original flat. These spares also lack full tread depth, so braking distances increase sharply on wet roads. Do not use a compact spare for towing, off-road driving, or long highway trips. Read the yellow warning sticker on the wheel itself. If your car has a full-size matching spare, you can drive normally but should still fix the original tire soon to maintain balanced handling.
Why When You Need It Most, Your Spare Might Be Flat
Rubber loses air through permeation. A spare tire that sits untouched for two years can drop to 20 PSI without showing visible deflation. Hot and cold cycles speed this up. Check the pressure every oil change or whenever seasons change. A portable air compressor that plugs into your 12-volt outlet solves this roadside emergency in four minutes. Some newer cars replace the spare with a fix-a-flat kit and an electric pump. Read your manual so a missing spare does not surprise you at midnight.
What to Do When the Lug Nut Is Completely Stuck
Road salt and over-tightened impact guns weld nuts to studs. Spray a penetrating catalyst like PB Blaster or Liquid Wrench onto the visible threads and wait. Tap the center of the nut sharply with a hammer to send micro-vibrations through the rust bond. Slide a long breaker bar with a six-point socket over the nut and apply slow, increasing pressure. If the edges round off, hammer on a slightly smaller “extractor” socket designed to bite into damaged metal. This job sometimes requires a mobile mechanic who carries induction heating tools, and knowing when to call one saves a snapped stud.
Building a Roadside Emergency Kit That Actually Saves Time
Your car came with the bare minimum. Upgrade the trunk with:
- A tire plug kit for small punctures you can fix without removing the wheel
- Heavy-duty reflective warning triangles
- A breaker bar with a deep-wall socket sized to your lug nuts
- Nitrile-coated gloves for grip and cleanliness
- A tire pressure gauge that reads accurately down to 10 PSI
- A small tarp or old yoga mat to kneel on
- Rain poncho and high-visibility vest
This kit turns a miserable one-hour ordeal into a fast 15-minute task. Store everything in a milk crate secured with a bungee cord so tools don’t slide under the brake pedal while you drive.
How to Identify the Cause of the Flat Before You Drive Away
Look at the rubber you just removed. A nail or screw in the tread center can often be patched. A gash in the sidewall means the tire is dead and the spare must stay on until you reach a tire shop. If you find no puncture, dribble soapy water over the tread and valve stem. Bubbles pinpoint the leak. A cracked valve stem costs $8 to replace at any shop. Running a tire that slowly deflates without visible damage risks a sudden blowout at freeway speeds.
Temporary Inflation Tricks When You Have No Spare
Some punctures seal long enough to reach a shop if you have a fix-a-flat sealant canister. Shake the can for 30 seconds, attach the hose, and empty the entire contents into the valve stem. Immediately drive two to three miles to spread the sealant evenly. This method ruins the tire pressure sensor and makes a permanent repair messier. Tire shops hate cleaning the goo, and some refuse the job entirely. View it as a last-resort solution, not a permanent fix.
Practicing in Your Driveway Builds Real Confidence
Reading about a skill creates a false sense of ability. Schedule 45 minutes on a Saturday afternoon. Park on level concrete, set your tools out, and physically go through every step—loosening nuts, finding the jack point, lifting, removing the wheel, and remounting it. Invite a friend or a teen driver in your family to do the same. The muscle memory you build in calm conditions returns under the adrenaline spike of a busy expressway shoulder.
When Professional Help Is the Smarter Move
It is a sign of knowledge, not weakness, to recognize a dangerous situation. If you find yourself stranded on a highway curve without a berm, in a driving downpour with limited sight, in deep muck or sand, or if you have two flats at once. Medical conditions or physical limitations that make lifting a 40-pound wheel unsafe also justify a call. Keep a roadside assistance number saved in your phone and know your car insurance policy’s towing coverage details ahead of time.
Frequently Asked Questions
How long does it take to learn how to change a tire?
A first-time attempt with this guide open takes 30 to 45 minutes. After two practice runs in a driveway, a normal tire swap takes under 20 minutes.
Can you change a tire without a jack?
No. A jack is the only safe method to lift a vehicle’s weight off the wheel. Using cinder blocks, logs, or the car’s own suspension as a ramp leads to catastrophic failure and severe injury.
Is it safe to spend a week driving with a spare tire?
A full-size spare works like a normal tire. A compact donut spare should travel less than 70 miles total and never exceed 50 mph. Check the sidewall for exact limits printed by the manufacturer.
What happens if you put the spare tire on backward?
The valve stem and wheel offset will face the wrong direction, causing the tire to rub against the brake caliper or suspension. Always mount the spare with the raised center facing outward and the valve stem accessible.
How tight should lug nuts be after a tire change?
Most passenger cars need 80 to 100 foot-pounds of torque. Without a torque wrench, use a star pattern to tighten firmly with both hands until the nut stops turning easily, then add a quarter turn with your body weight.
Why does my car shake after changing a tire?
Unbalanced wheels, missing wheel weights that stuck to the old rim, uneven lug nut torque, or mud packed onto the inside of the wheel cause vibration. Stop and re-torque the nuts in a star pattern. If the shaking continues, visit a tire shop for balancing.
Your Next Steps for Total Tire Safety
Learning how to change a tire saves you hours of waiting and often a $100 service call. Store this guide in your phone and read it again tonight. Take 10 minutes this weekend to locate your jack, check your spare’s pressure, and practice loosening one lug nut. That tiny investment of time switches your role from stranded victim to capable problem-solver. Share this page with a new driver who has never touched a lug wrench—the life you protect might be theirs.